Onboarding
The six-step onboarding checklist for each new employee, ending with their deployment to a client site, and the Onboarding tracker.
Every new person goes through a six-step checklist that ends with them posted at a site. Start it from the employee's profile; track everyone on the Onboarding page.
Who can do this: Admin, HR Manager (onboarding.manage), with documents.manage, consents.manage and verifications.manage for steps 2–5.
Start
Sidebar → Employees → Profile on the person's row → Start onboarding. This opens the wizard at /employees/<id>/onboarding.
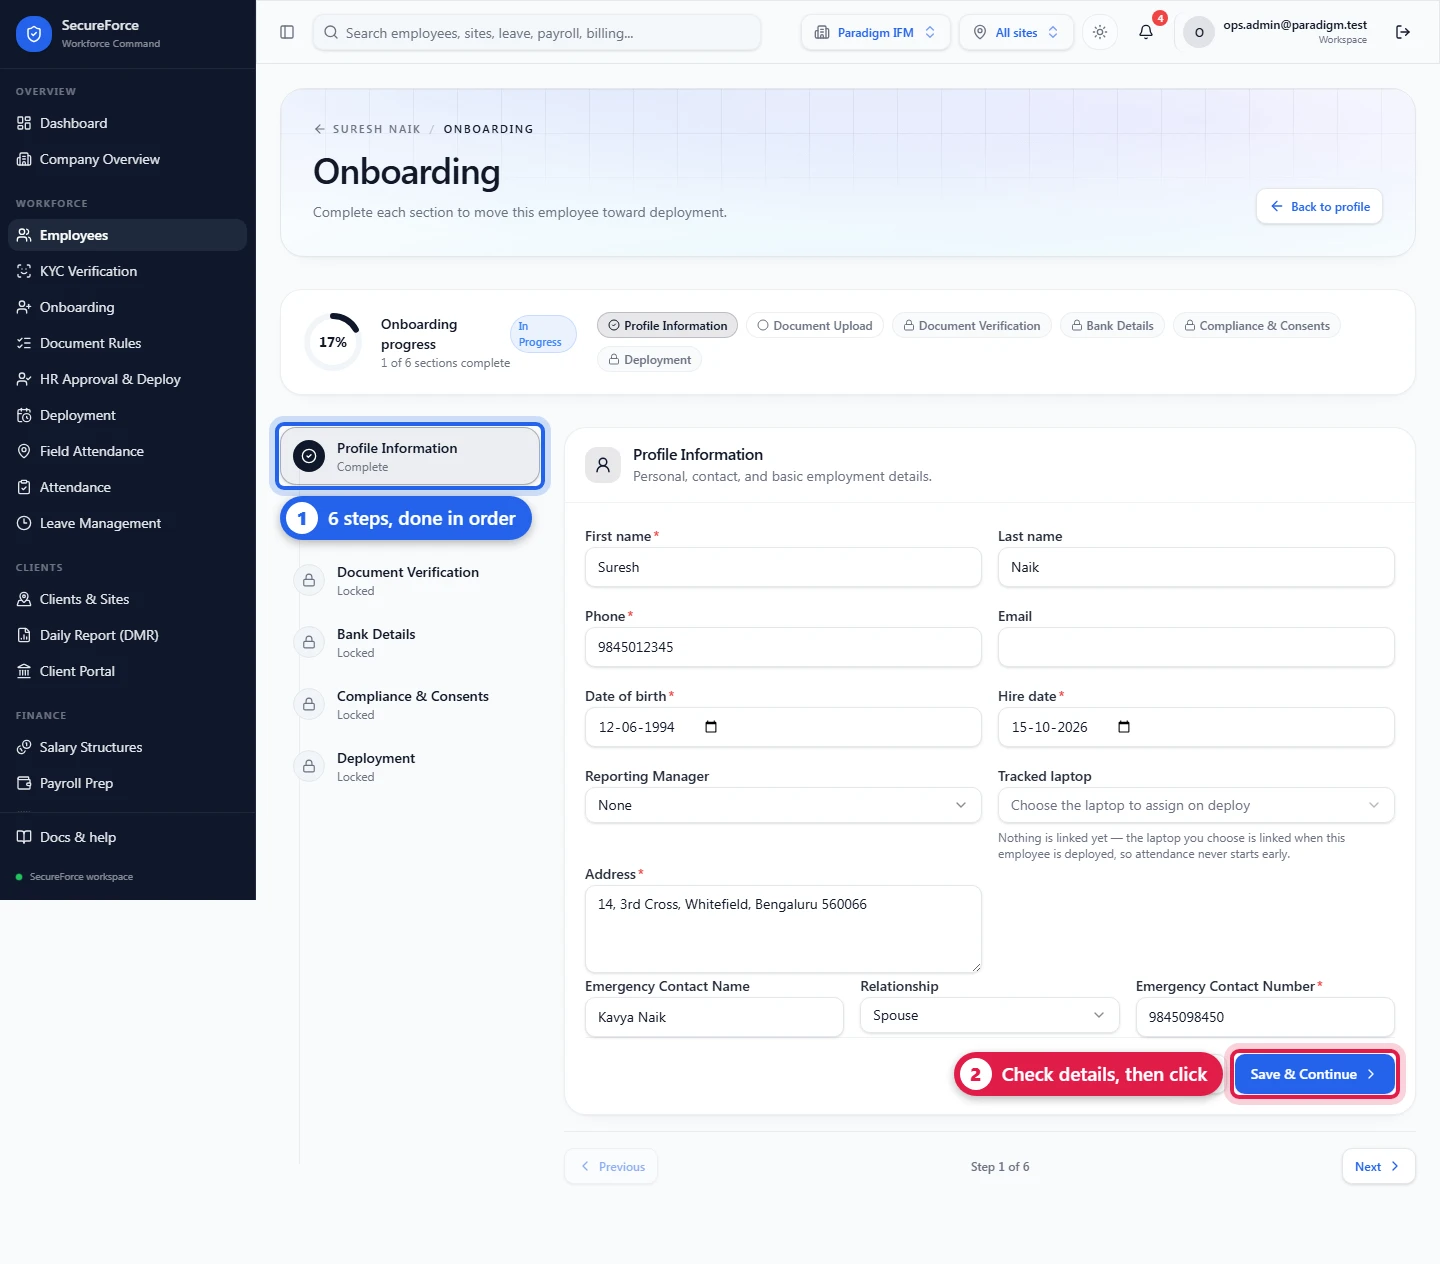
The left column lists the six steps with their state (Complete, In progress, Locked). The top shows Onboarding progress (e.g. 1 of 6 sections complete). Each step unlocks when the one before it is complete. Save keeps your work; Save & Continue moves on. Previous and Next move between steps.
1. Profile Information
Check the name, phone and (optional) email, and fill in the required Date of birth, Hire date, Address and Emergency Contact Number. Optional: the emergency contact's name and relationship, Reporting Manager, Laptop ID. Save keeps a half-filled profile; Continue needs the phone and emergency contact number.
2. Document Upload
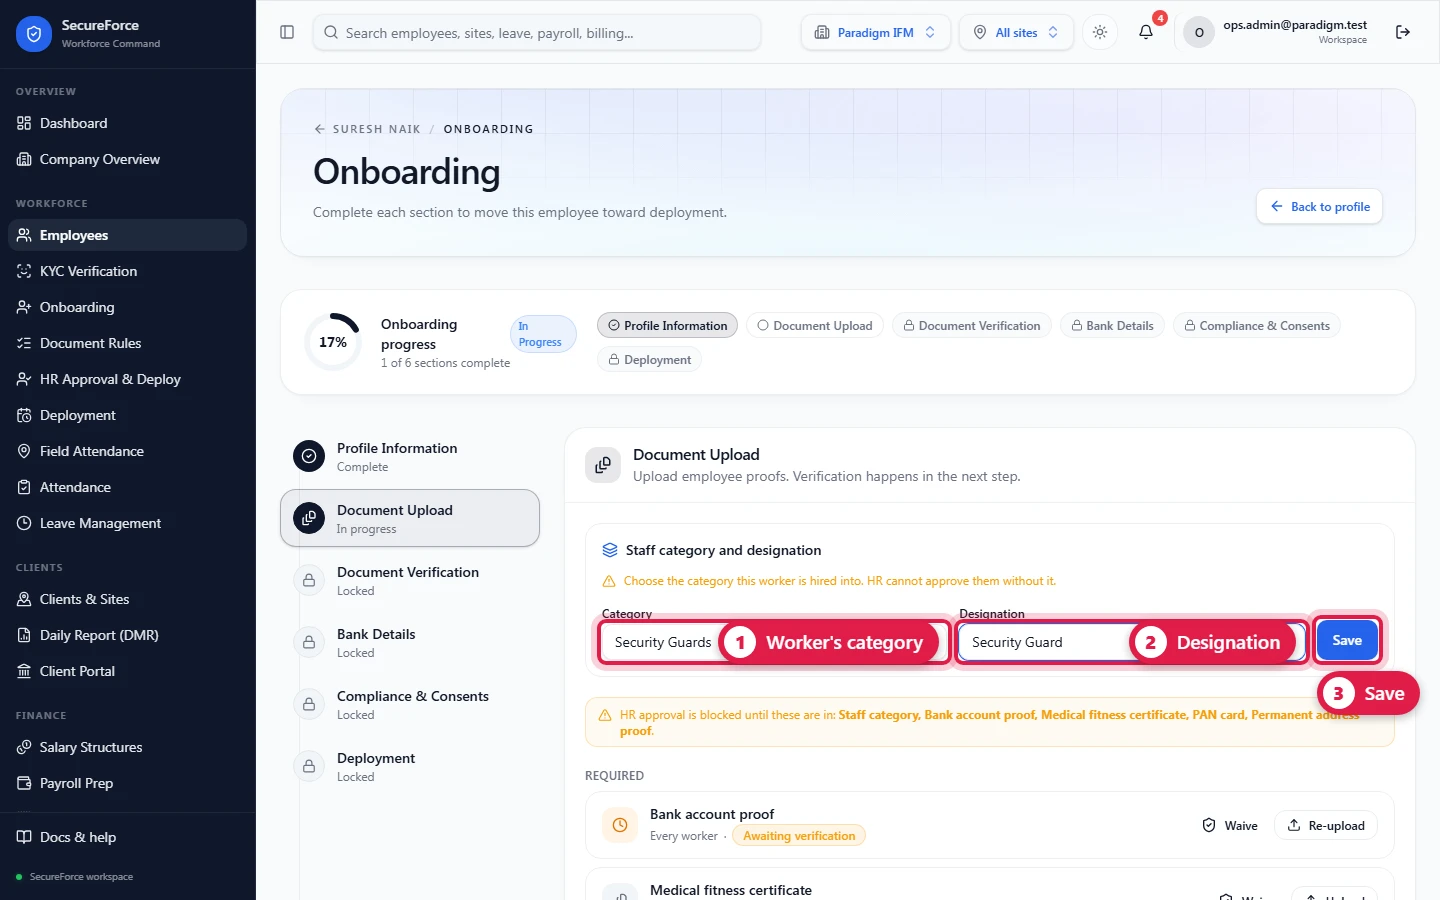
At the top, choose the worker's Staff category and Designation (e.g. Operators & Technicians · Electrician) and press Save. They decide which documents are mandatory for this worker — see Document rules. Once your workspace uses categories, a worker without one can't be approved.
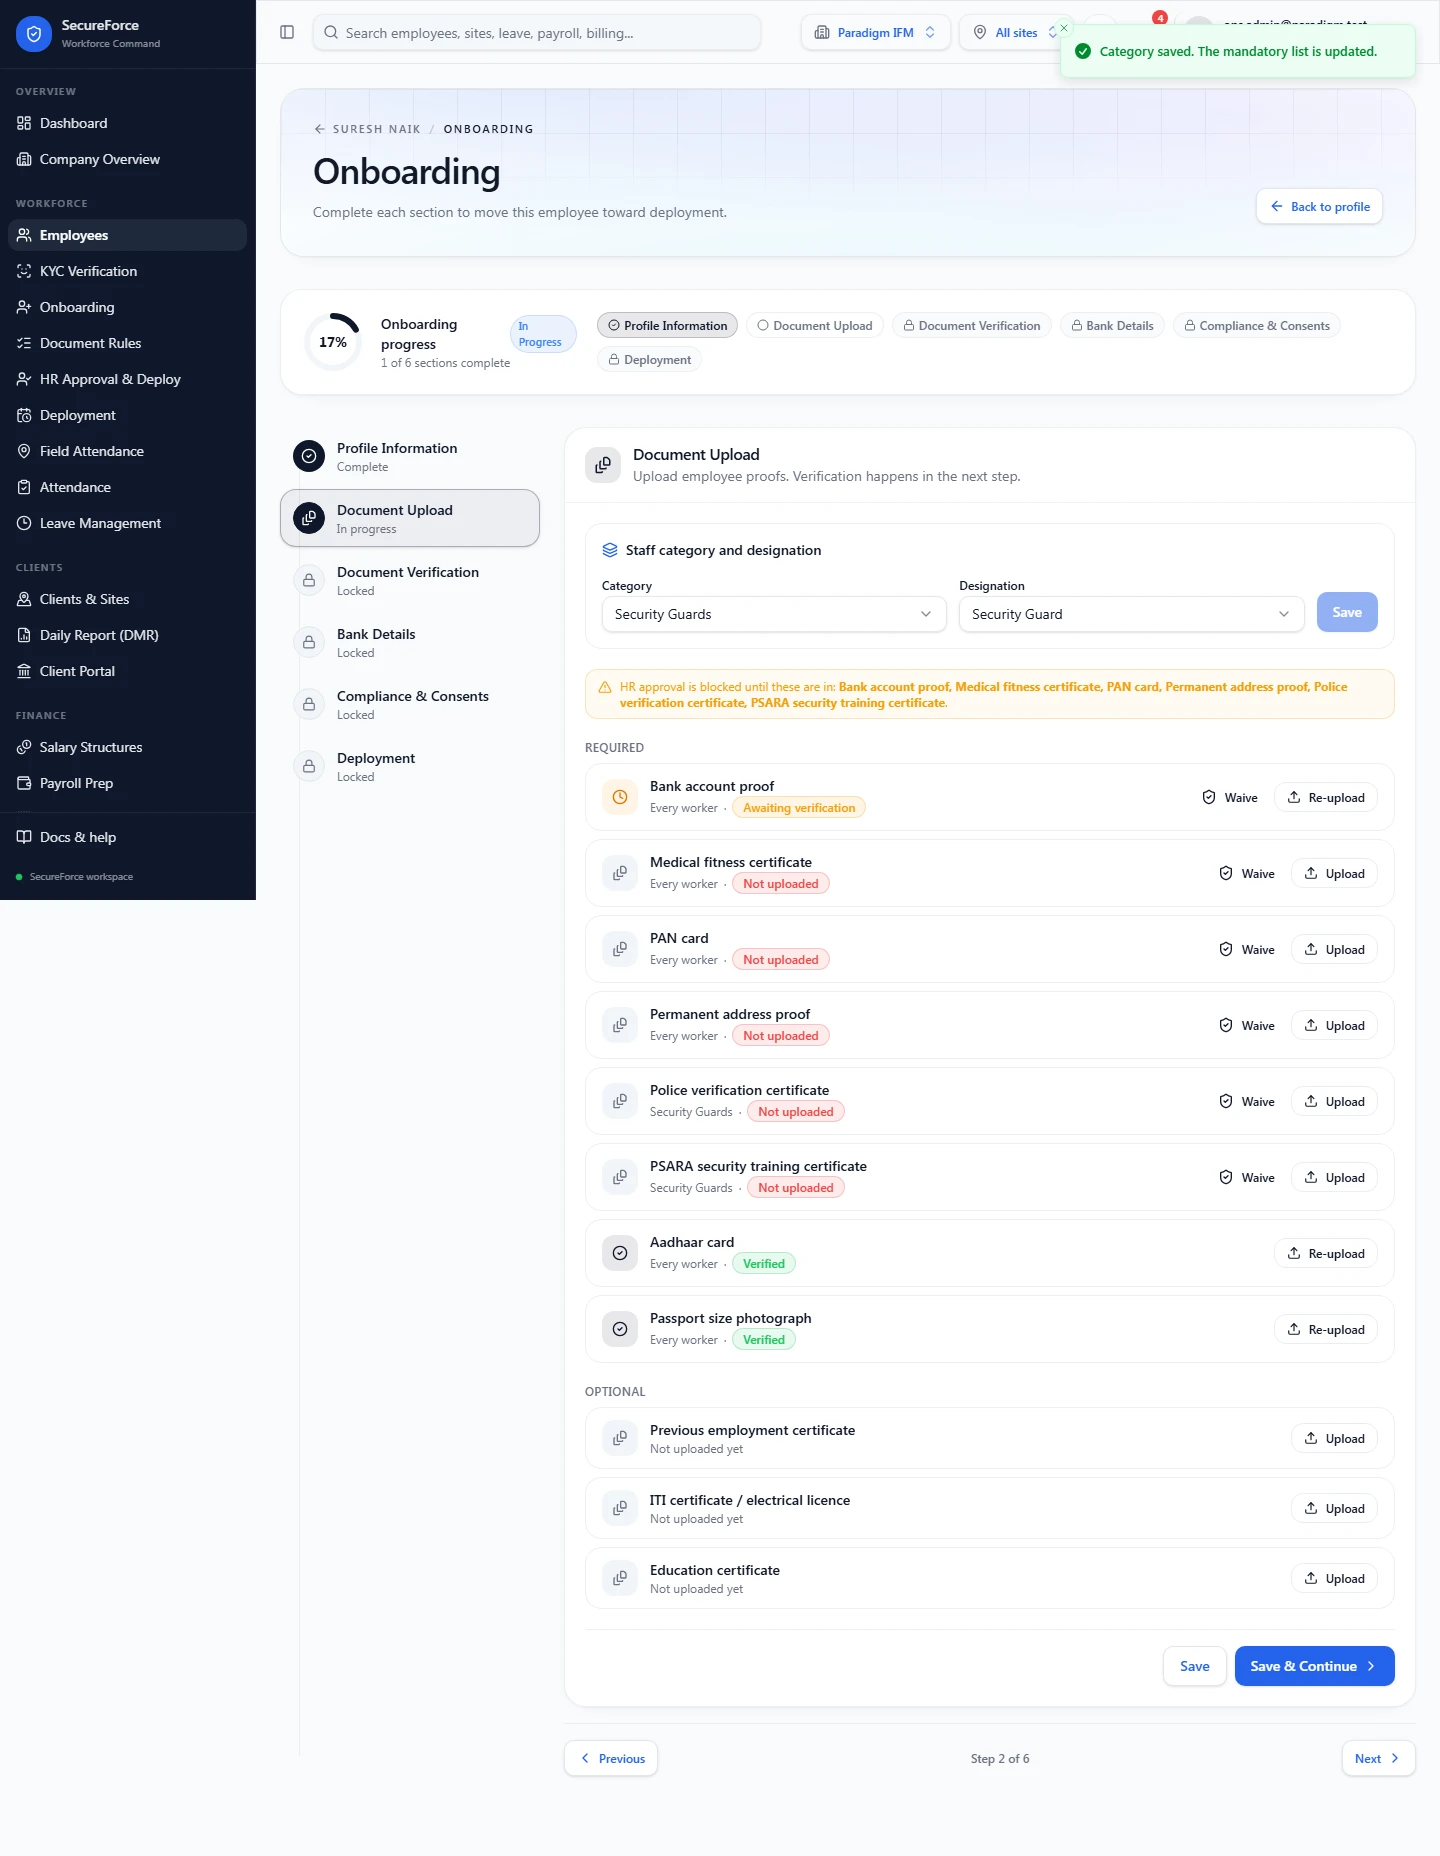
Required then lists this worker's mandatory documents: the ones every worker needs, plus what their category and designation add. Each line says where it comes from and its state (Not uploaded, Awaiting verification, Verified, Rejected, Expired, Waived). Everything else is under Optional.
Press Upload next to each and choose the file (PDF, JPG, PNG or WEBP). On a phone this can open the camera. Each upload shows as Submitted; Re-upload replaces it.
If a mandatory document genuinely doesn't apply to this person (e.g. a first-time worker has no previous employer certificate), HR can press Waive and give a reason. The reason and who gave it are recorded.
A line under the list says either that nothing blocks approval, or exactly which documents still do.
If it says "No document types configured", add them first under Employees → Document Types.
3. Document Verification
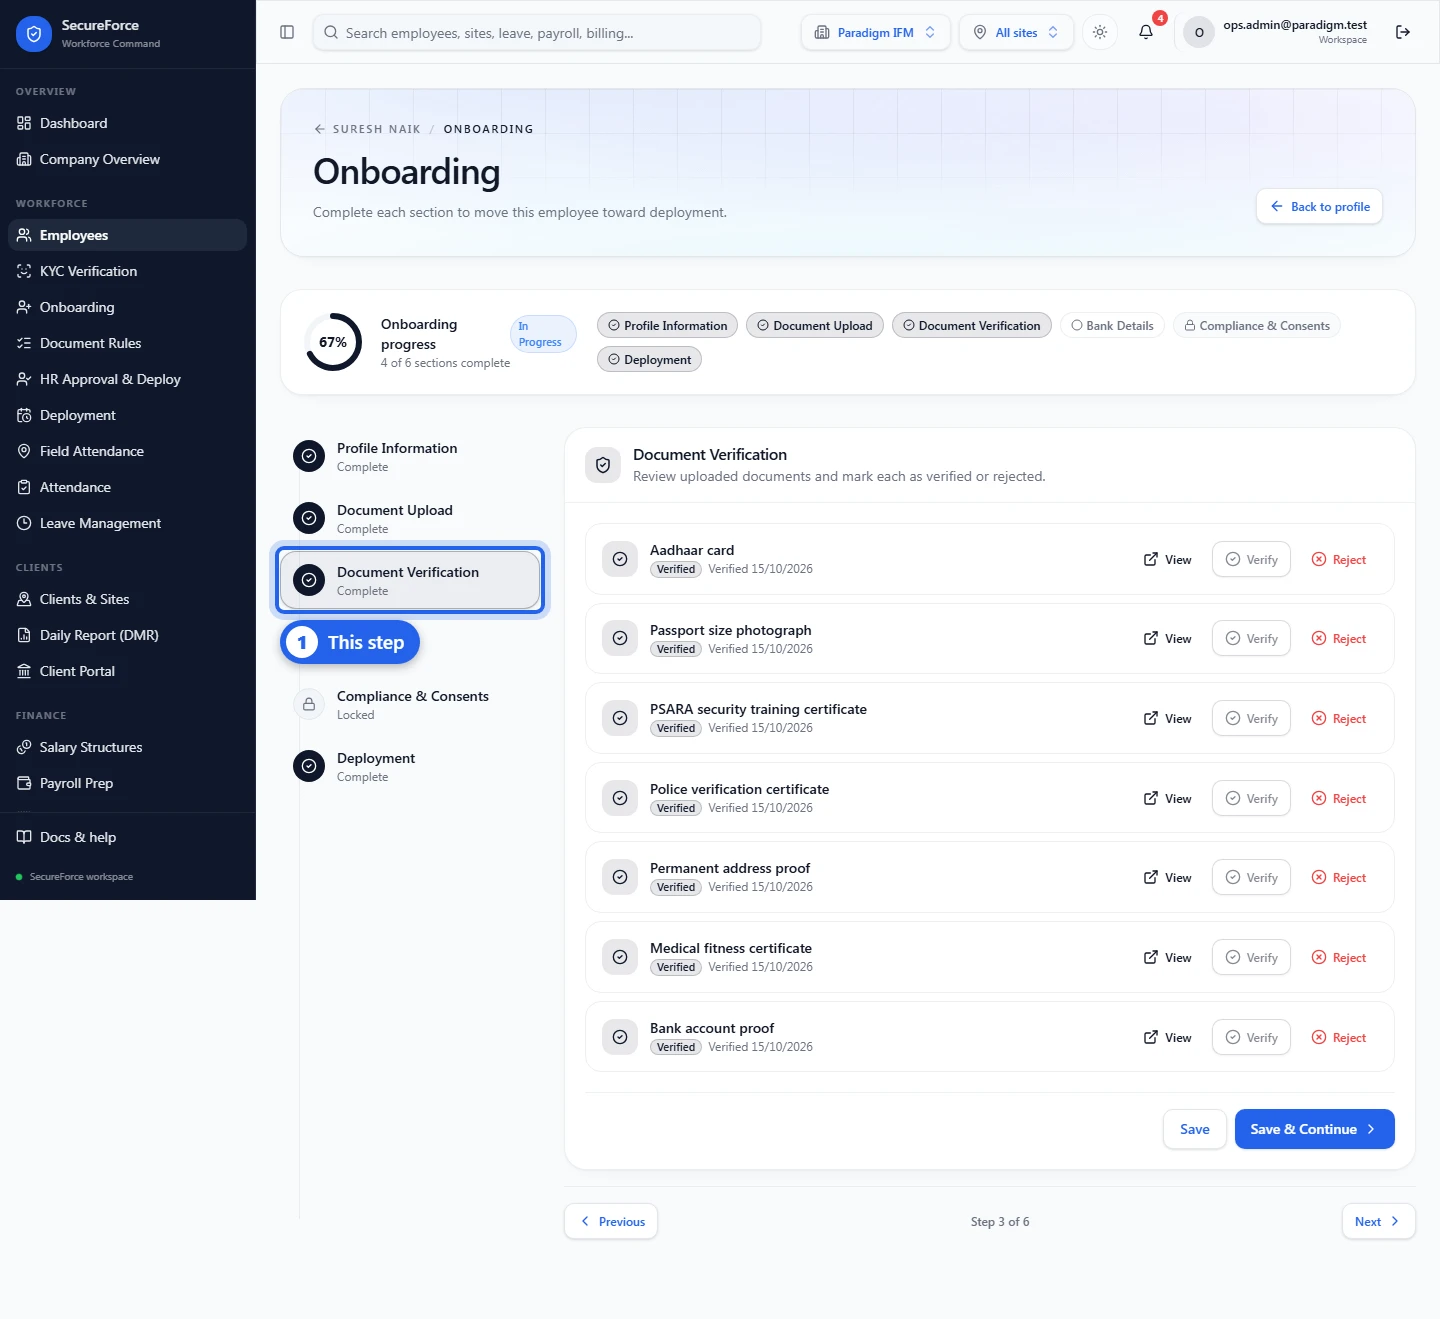
Each upload is listed with View, Verify and Reject. Open it, check it against the original, and press Verify, or Reject if it's wrong or unreadable (the person then re-uploads in step 2). Every required document must be Verified (and, if it has an expiry date, not expired) or waived to continue.
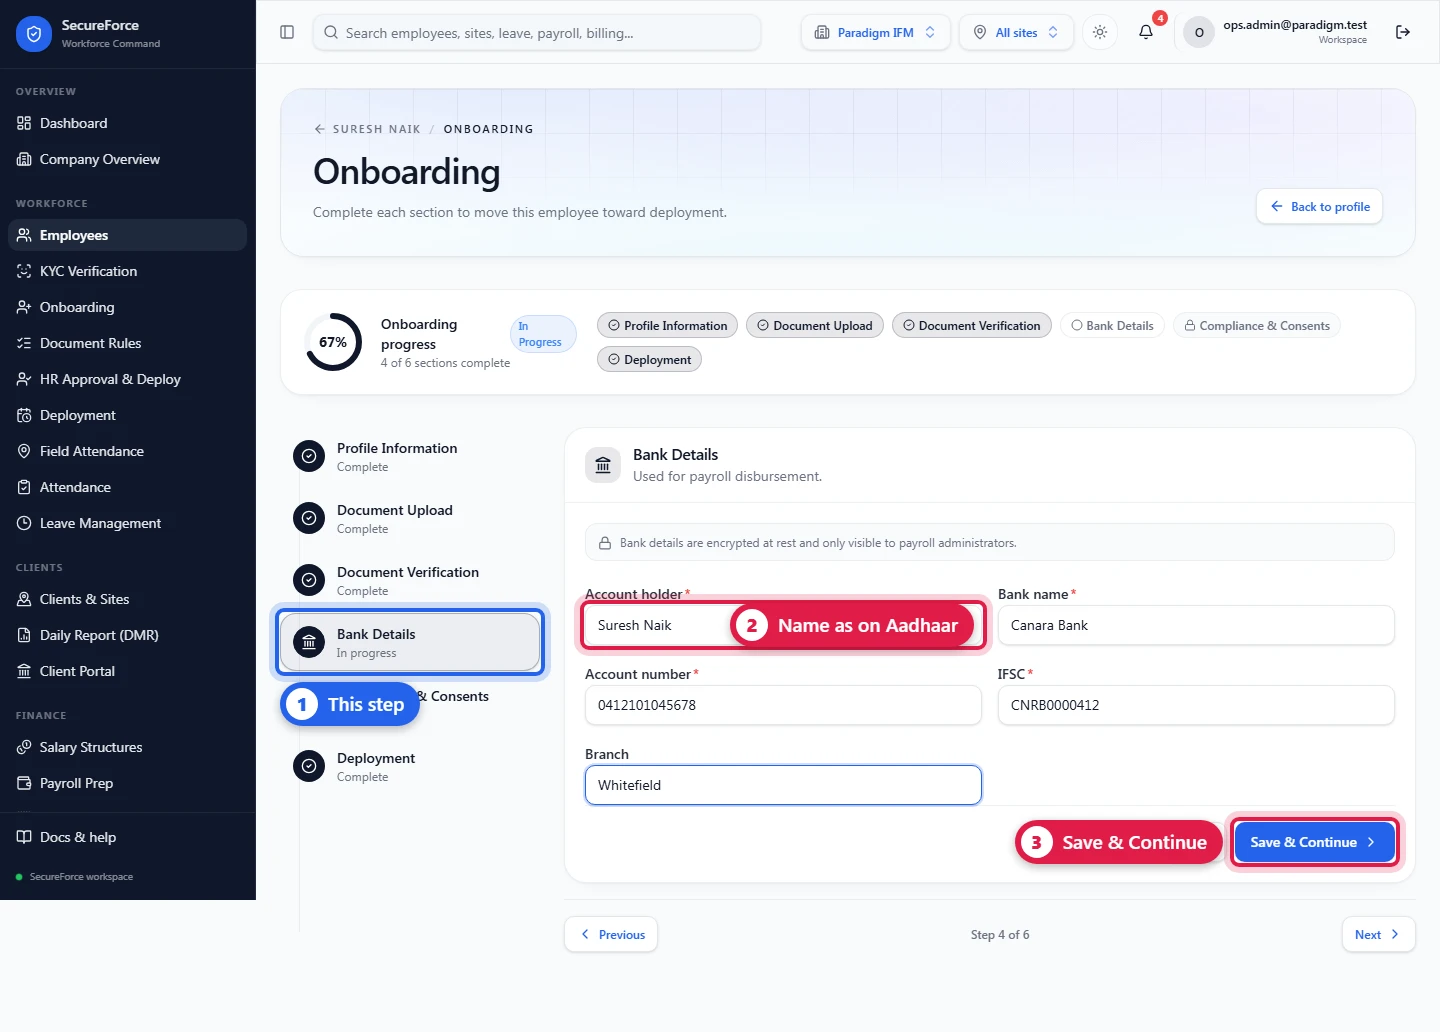
4. Bank Details
Account holder, Bank name, Account number, IFSC, Branch. Payroll uses this account; the holder's name should match the Aadhaar.
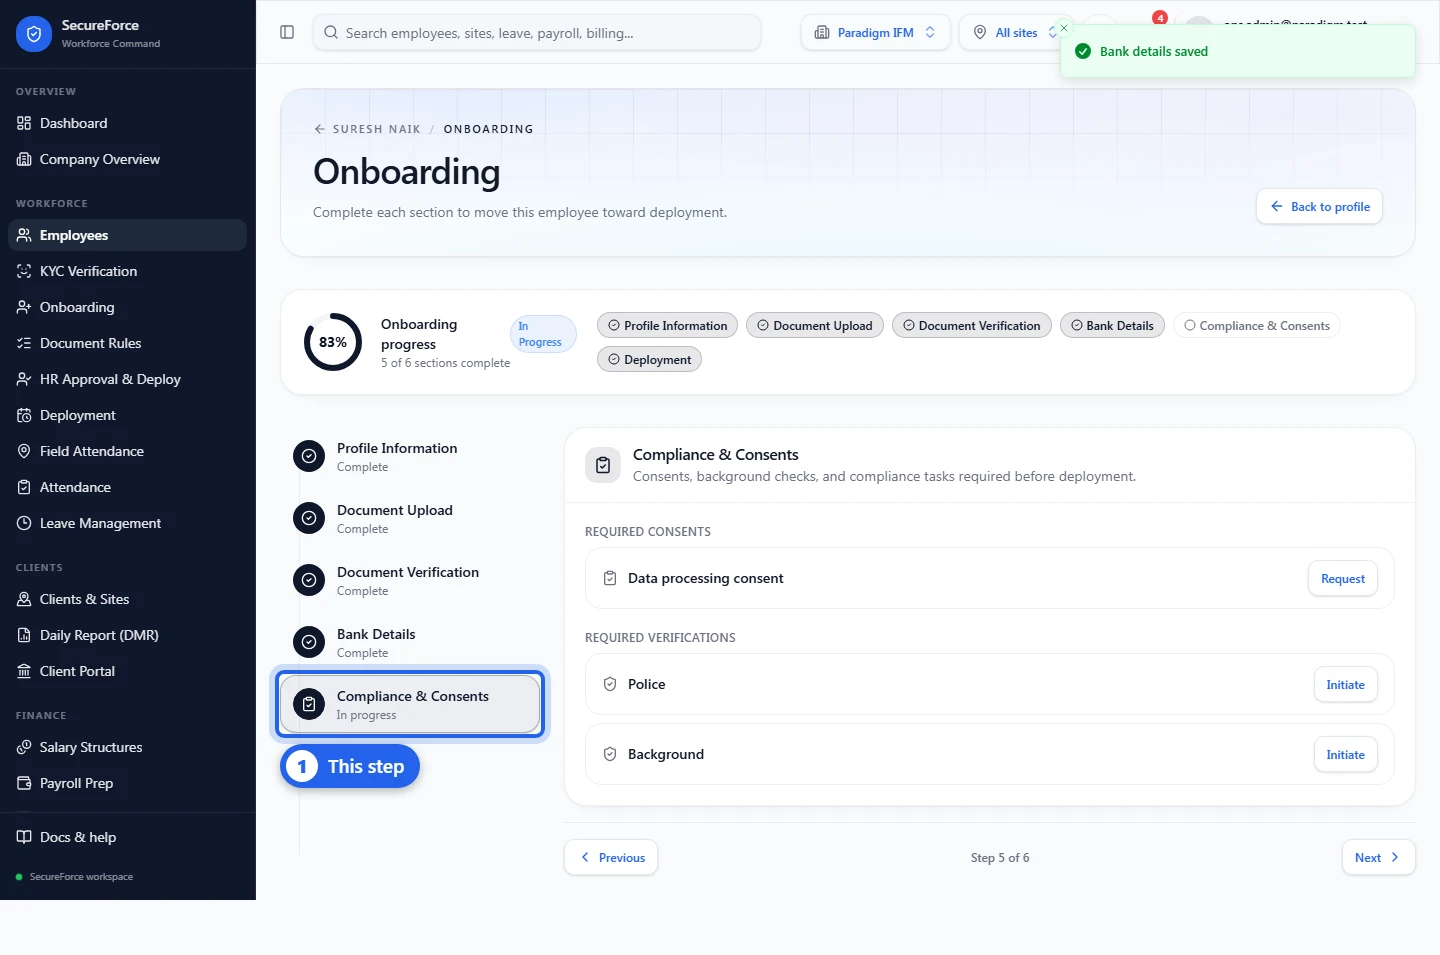
5. Compliance & Consents
- Required consents: press Request, then Mark Granted once the person has agreed (Withdraw undoes it).
- Required verifications (background checks): press Initiate when you send the check off, then Mark Clear when it comes back clean, or Mark Failed. A failed check can be retried with Retry.
The step is complete when every consent is granted and every verification is clear.
6. Deployment
Press Add deployment and choose:
| Field | Required | Notes |
|---|---|---|
| Client | Yes | |
| Site | Yes | Only that client's sites are listed |
| Service line | ||
| Role title | e.g. Security Guard. Spell it exactly as the approved headcount designation. | |
| Pay rate | Per day: what you pay the person | |
| Bill rate | Per day: what you charge the client |
For new hires, Approve & Deploy does this step for you. Here it already shows the deployment it created:
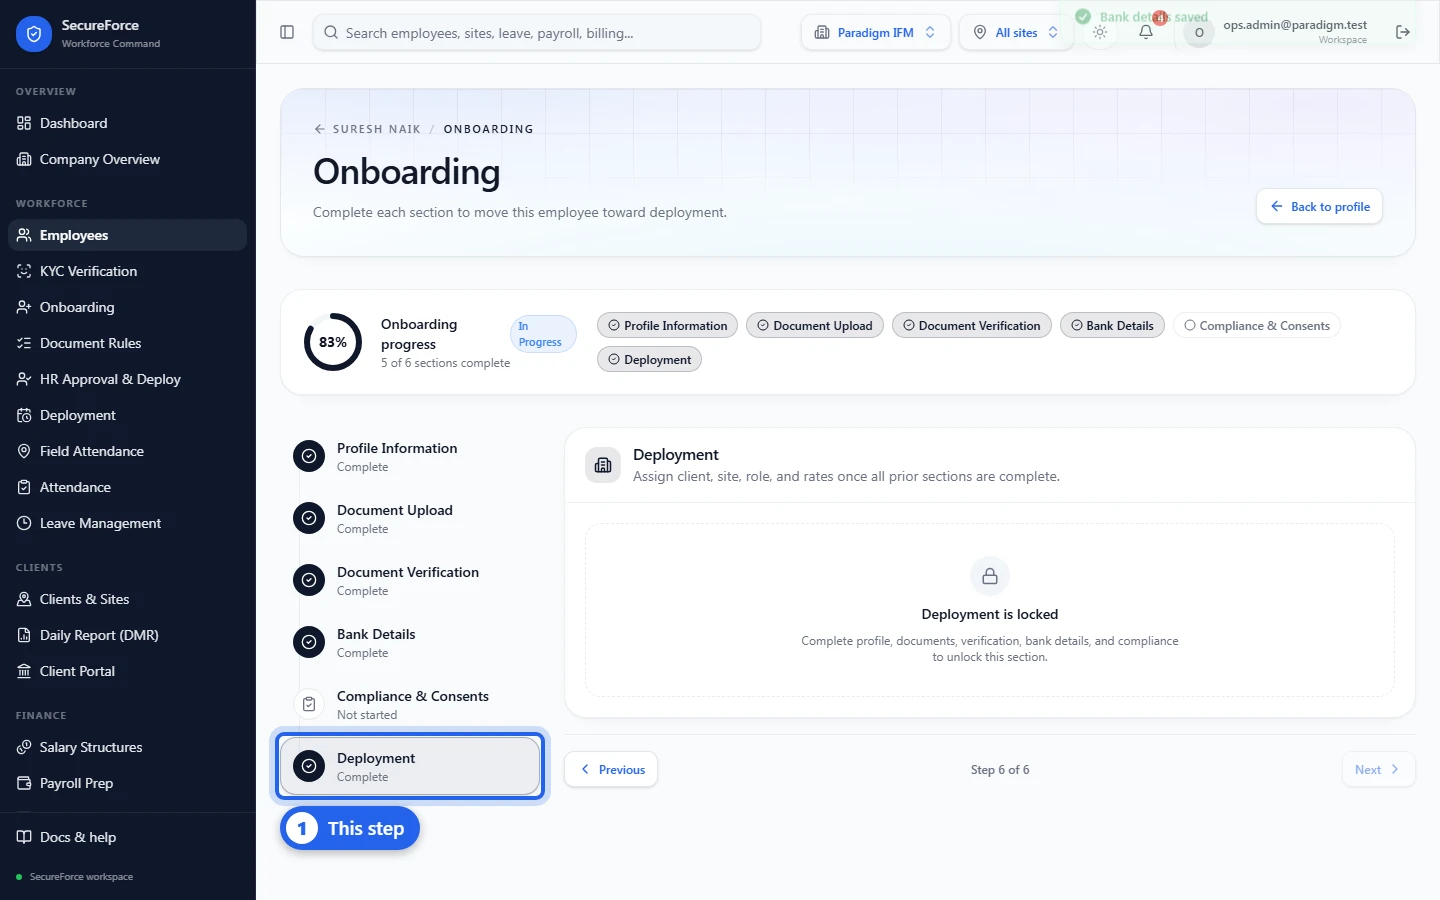
Press Create deployment. The deployment starts today. Change its start date, status or end date later on the Deployment page. When all six steps are done, the banner shows Onboarding complete.
HR approval and mandatory documents
Completing onboarding is HR's approval of the worker. It is refused while any mandatory document is outstanding — missing, awaiting verification, rejected, or past its expiry date and not waived — or while the worker has no staff category (once your workspace uses categories). This is enforced by the server, so it also applies to bulk onboarding and to editing a case's status directly; the message names exactly what is missing.
An approval already given is never undone by a later rule change.
For new hires, the formal sign-off — salary structure, e-signed contract, optional second approver, employee ID — is on HR approval, followed by Approve & Deploy, which creates the deployment that completes step 6.
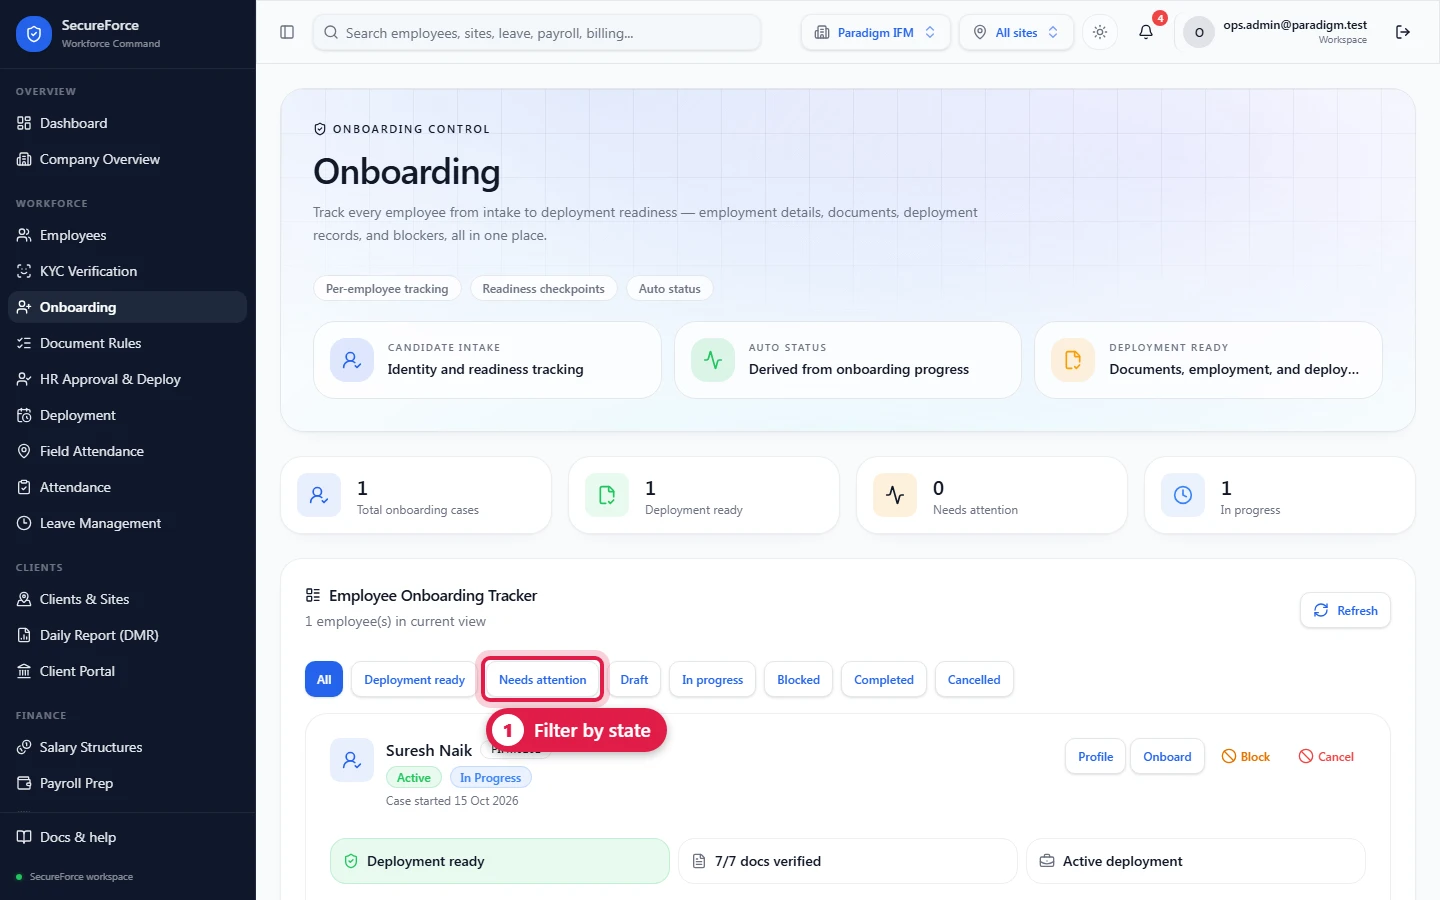
The Onboarding tracker
Sidebar → Onboarding (route /onboarding) lists everyone being onboarded with their progress, documents, deployment records and blockers. Counts at the top show Total onboarding cases, Deployment ready, Needs attention and In progress. Filter by Deployment ready, Needs attention, Draft, In progress, Blocked, Completed and Cancelled.
How it connects
- Uses the employee record and the document types.
- Step 6 creates the deployment that the roster, daily report, payroll and billing rely on.
- For security staff, also run KYC before deploying.